First a little back story: Our home is filled with mattresses but not a single cozy bed in sight. There are a total of three doubles and one twin {and Finley's crib but it cant be tampered with for safety sake}. None of which, before now, had any quality frame or visual appeal at all. And since moving into our home I have been saying, or arguably nagging, that we need to invest in making each a welcoming spot for ourselves, as well as guests.
The kicker: Both Robert and I can be on the cheap side at times. Cheap is a harsh word. I prefer selective spending. And buying a bed frame, let alone the gorgeous fabric covered headboard and frames that I am ooing and awing over, never seems to top our list of priority purchases. Which is why Ive been concocting a plan to do it ourselves, keep some cash in our pockets, all while achieving a gorgeous and comfortable statement piece in the bedrooms of our home.
First stop? Finley's room. A twin bed seemed like a logical leaping off point on this mission with its smaller dimensions and less costly supplies list. That way if we made a big booboo it wouldn't be a huge loss.
Here we go:

1. Robert measured and remeasured all the pieces for the wooden frame. Then he went ahead and cut everything down to size.
2. Preassemble the bed legs. We went ahead and painted the base portion that would be seen once attached.
3. He then attached the wooden rectangular pieces that will act as support for the cross planks later on.
But the build paused there.

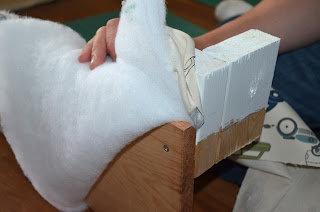
4. We then carried the preassembled pieces to a clean space and began covering one frame board at a time with pre cut batten and fabric pieces.
5. Spray the front of your board and the back of your batten with a spray adhesive {optional}. Then lay the batten and fabric on the board, pull tight, and staple at the top and bottom of the back of the board. Continue for the length of the board.

Do take your fabric pattern into account when pre cutting your fabric strips. *Naturally we would choose a challenging pattern that added difficulty to the project. In order to make the truck pattern line up we had to cut the strips in twelve inch high pieces to avoid wasting large portions of our fabric. This did not allow for a lot of excess fabric overlapping the backs of the boards. But I came up with a solution for that at the end.

6. Staple the batten and fabric all along the bottom of the board to the very end. **Leave the top unstapled toward the end until attaching the preassembled bed leg.
7. Attach the leg by screwing through the front of the covered board.
8. Tuck the fabric and batten behind the following board to be attached at the corner and screw it in place.

9. Once the next board on the frame has been attached, finish covering the corner with the batten and fabric by stapling along the top of both boards.
Continue stapling the batten and fabric along the top and bottom and repeat steps 6. through 9. for the other end corner.

When your fabric strip comes to and end, you'll need to match up the next piece of fabric. Because we had taken this into account before cutting, the pattern met up perfectly from top to bottom. We just folded the ends to meet the pattern from left to right, ironed it down, matched it up on the frame, and stapled in place.

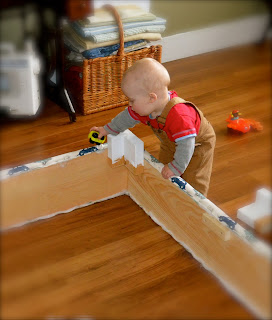
Finley was the best little helper along the way! Toy cars are the newest addition to the household toolbox.

We then carried the frame to its final destination and covered the overlapping fabric ends with stripping to prevent fraying. The additional support will better support the fabric and help ensure it lasts through years of wear and tear.


10. Place the stripping over the fabric ends and staple in place.
Your end result is a kid friendly bed frame that will protect from sharp corners and stimulate little minds with a fun pattern. Not to mention Mom and Dad can be proud of the room they have put together for the wee ones. Or at least that is the case with this household!
Check back later this week for the next step in this process.
But what about you? Have you ever built a bed frame yourself? What about an attempt to add fabric? How did you go about it? I'd love to hear from you! We could try a new approach for our next attempt! *Just dont tell Robert there is another in his future!
Chat soon.


Oh what a day tha was lol ... We made it through it. Only a few hairs pulled out.. The striping looks good . Cant wait to see it when i get home
ReplyDeleteLook at you go! I love this and the bed looks awesome in Finley's room!
ReplyDeleteAn amazing idea, and a job well done, it looks great.
ReplyDelete